Table of Contents
- Overview
- Dynamic Luminance Detection
- Variable Patch Targets
- Special Averaging Support
- Measurement Smoothing
- Falses Correction
- Start Points
- Channel Curve Smoothing Tutorial
- Variable Ink Limiting
- Target Luminance Calibration
- Contrast Tweaking
- Channel Remapping
- Curve Blending
- Curve Inversion
- Save a Copy
- Physical Ink Mixing and Blending
- Repurposing Clogged Printers
- Ink Placement Charts
- Initial Fill Instructions
- 1400/1430/1500 Instructions
- P400/R1900/R2000 Instructions
- R3000/P600 Instructions
- 3800/3880/P800 Instructions
- 4000 Instructions
- 4800/4880 Instructions
- 4900 Instructions
- 7600/9600 Instructions
- 7800/9800 7880/9880 Instructions
- 7890/9890 Instructions
- 7900/9900 Instructions
- P6000/P8000 Instructions
- P7000/P9000 Instructions
Piezography Manual
Software Installation
Overview of Required Software
QuadTone RIP Installation on MacOS
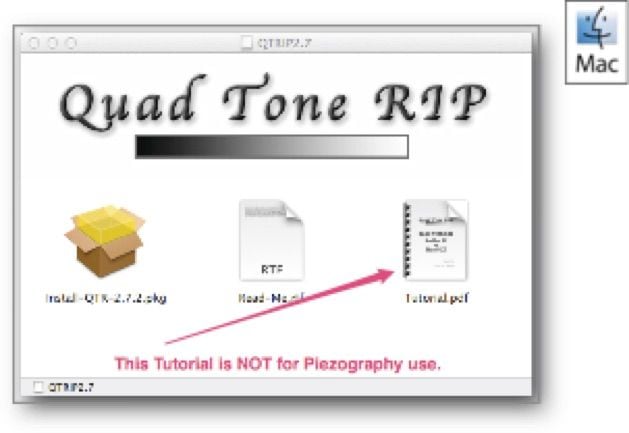
Installation on Mac includes installing the (1) QuadTone RIP package, (2) Print-Tool, (3) the Epson Printer driver and utilities, and then finally (4) the Piezography Community Edition curves archive.
 Download the QuadTone RIP package from
http://www.quadtonerip.com. This includes the installation package that puts the underlying printer drivers into your system.
Download the QuadTone RIP package from
http://www.quadtonerip.com. This includes the installation package that puts the underlying printer drivers into your system.
But, please do not use the downloaded Tutorial.pdf for Piezography Workflow. Use the manual that you are now reading as a tutorial!
Follow the on-screen directions provided by the QTR installer.
Please make sure that you pay the author his shareware fee when you have finished installing the package!
Print-Tool Installation on MacOS
Print-Tool is a wonderful (Mac-only) utility created by Roy Harrington, of QuadtoneRIP fame, that lets you drag and drop multiple images onto a single print canvas, arrange them, and print them with full color-management. Over the years, Apple, Adobe, and Epson have conspired to hide and get-rid-of full color controls for fine-art printing. Their thought was to make the user interface simple and easy for novice users, however in doing-so, they succeeded in dumbing down the process and getting rid of much-needed features like “no-color-management” and grayscale ICC printing. Print-Tool is a nifty utility that gives back these features to the printmaker. Print-Tool is a required software for fully color-managed Piezography printing on the Mac! You can download it at quadtonerip.com
Print-Tool is installed by downloading the .zip file from quadtonerip.com. Double clicking the .zip file will unpack the application and this should be dragged to your Applications Folder.
**Windows users already use a stand-alone QTR application called QTRgui that is installed when the Windows version of QuadtoneRIP is installed.
QuadTone RIP Installation on Windows

Windows users can download and install the latest version of Quad Tone RIP from here: http://www.quadtonerip.com
The software is an executable and is installed either during the download or after the download. This is always a process that is set by the user when the download link is clicked. We recommend that you install after the download so that a copy of the installer remains on your computer. Please select the Default locations so that QuadTone RIP is installed and appears in your Start Menu.
After installation is complete, you will see a QTRgui application. This is the application that you use to lay out your image and select the Piezography curve (profile) that you will print with. However, Piezography curves must first be downloaded with the Piezography Community Edition (next step).
We recommend that you install the Epson printer drivers and utilities for your printer so that you have access to the alignment and printer utilities. Without doing so, will you not be able to use QuadTone RIP.
Piezography Community Edition
 To install new Piezography curves to use with QTR on Mac OS, you will need to do the following. Download the Piezography Community Edition Mac version. Install it and navigate to /Applications/Piezography/Curves/(Your Piezography Printer Model). Power on your printer and make sure it’s connected to the network or to your computer (via USB). Double click on the install.command in the curve folder and all of the piezography curves inside of that folder will be installed. A new printer will be created and you will be able to select this printer (and installed curves) when printing from Print-Tool.
UPDATE: Latest versions of OS-X now have permission issues that are extremely strong. The installation of curves takes place in a directory that Apple no longer believes that any user would be accessing. You may, for example, see an error during installation that looks like this:
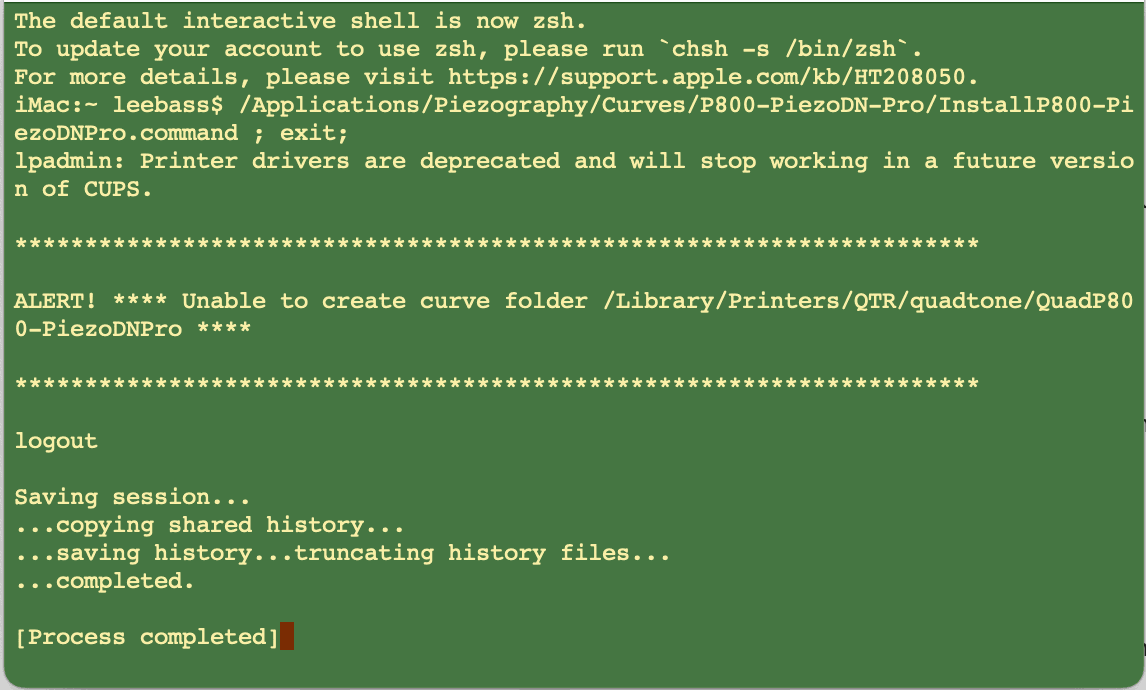
In this case you need to open up permissions in OSX by typing a UNIX command into Terminal which is located in your Applications folder. This command which you can copy and paste is:
sudo chmod -R 777 /Library/Printers/QTR/quadtone
NOTE: If your printouts are very dark or nearly black - it is always a result of permissions errors. These are difficult to detect unless you monitor your print queue. However, the fix can be as easy as navigating to your Library / printers / QTR / quadtone / the name of the folder you just installed curves into and select the offending curves, select File / Get Info or right click Get Info and the permissions for "everyone" must be Read & Write. In this case, QTR is an "everyone".
Photoshop and Lightroom
We believe that you should install both these applications.
Setting Up Lightroom
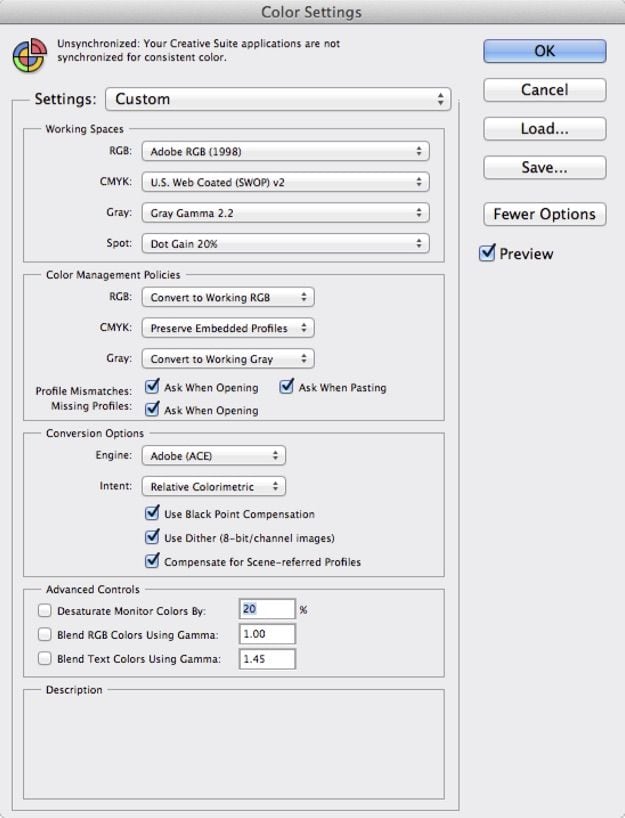
 There is only one important dialogue to setup in Lightroom. It controls the output of your file when you print it or edit it outside of Lightroom. The ProPhoto Color Space can not be used because it’s gamma is incompatible with Piezography and images saved in ProPhoto will print with unexpected results. ProPhoto is ideal for images made with camera sensors to remain in a working space suited to the raw data from the camera sensor. The Gamma is 1.0 or scientific gamma. Gamma 1.0 is not suitable for looking at images. We would not be able to see what looks like a normal contrast. Because ProPhoto is so inappropriate for image viewing, Adobe continues to use Adobe RGB 1998 in conjunction with it in Lightroom. A very complicated viewing condition is made by Adobe to compensate.
Setting Up Photoshop
 Photoshop is the application through which to make most of our critical corrections to images as well as define the way to sharpen our images. These concepts can be brought back into Lightroom, which is a virtual space for sharpening and correcting imaging issues. We can not actually see the defects in Lightroom that it produces. Or I should say, we can not easily seem them as we can with Photoshop.
Piezography Professional Edition
The Piezography Professional Edition is a new thing. It enables DIY (Do It Yourself) high-quality linearization (calibration), and tuning, of Piezography curves. This package is an add-on to the Community Edition that includes as set of tools for measuring Piezography targets, extra targets, the Piezography Deluxe manual with documentation on how to use all the tools, and much more. To properly utilize the Professional Edition, one must download the Community Edition first and then buy the Professional Edition at shop.inkjetmall.com. After purchase of the Professional Edition, staff at InkjetMall build a custom Google Drive spreadsheet that is shared with each Pro edition subscriber. This spreadsheet is the final tool that enables correct measurements of Piezography target data. So, in order to use the Pro edition, one must have a Google account. To install everything but the shared google spreadsheet, you will get a username and password to Piezography.com that will enable download of the Piezography Professional Edition windows and mac packages. This may take up to 48hrs after the purchase of Piezography Professional Edition, because each username and password is added manually by staff at InkjetMall.
PiezoDN
PiezoDN is our professional-level digital negative solution. It’s a set of curves and tools for printing and calibrating digital negatives with Piezography ink for any darkroom process. This software is available for purchase at shop.inkjetmall.com and is downloaded from piezography.com/piezodn. Full documentation and instructions are available after download in The Piezography Manual Deluxe Edition and at piezography.com/piezodn.