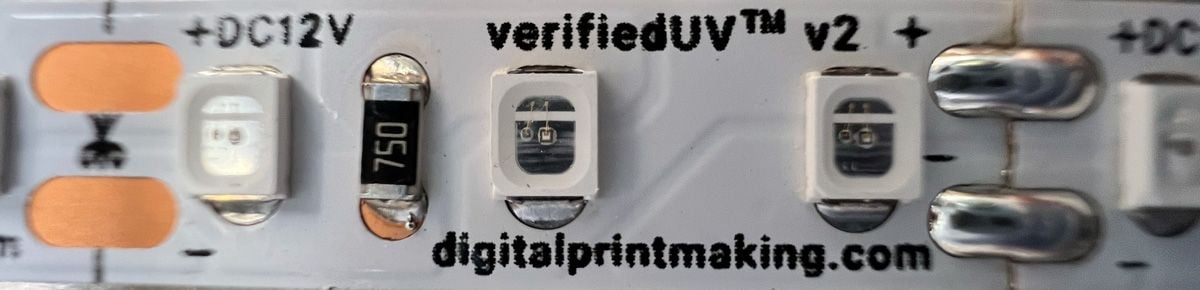
verifiedUV™ 365nM UV High Output Light Strips (Sold in Five Meter Reels)
 The success of this product is due to very high output of 365nM UV radiation and the efficiency at which it is produced. It is a perfect marriage of a novel LED chip and a proprietary PCB developed exclusively by Cone Editions Press and distributed exclusively by Vermont PhotoInkjet in Topsham, Vermont. When properly configured it can produce platinum print exposures of 60 seconds. If exposure speed is your bottleneck, this little chip will speed up your workflow.
Buy THE LED Light Strip Reels Here CONFIGURE YOUR PANEL HERE. BUY CONNECTORS HERE
-
Designed specifically for exposing alternative process photography
-
Produces higher volume of 365nM irradiance than any other product of its type
-
Higher in efficiency than competing products
-
Attractive cost to UV irradiance ratio
-
Easy to build with
-
Rated for 50,000 hours
-
Manufactured and distributed exclusively by Vermont PhotoInkjet, LLC
-
When configured in a squared grid (3mm between strips), and measured with the Ian Leake LC5+ Light Integrator produces an irradiance of over 7000 µW/cm² at 4-6 inches, and can expose platinum/palladium prints in just 60 seconds.
-
8mm wide by 5000mm length (5 meters)
-
Requires 10 watts 12 volts per meter
-
Can be cut to new lengths every inch
-
Uses strong adhesive for mounting

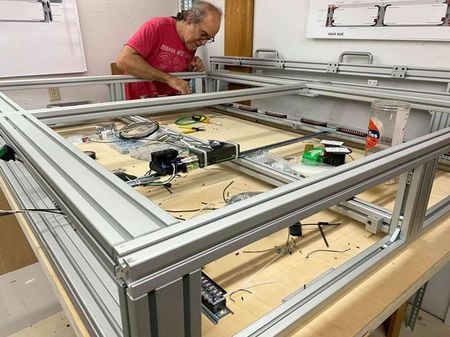
During the Covid lockdown March through May 2020 when I was unable to have staff or visitors I began designing a 45”x65” vacuum LED UV exposure system for Cone Editions Press. I had been using a Nuarc 32" flip top single point 3000w metal-halide system for platinum print, photopolymer gravure, and cyanotype. 3000 watts is a lot of power for 32" wide media and the studio was getting an exposure time of about 6 minutes for a platinum print. My goal was to build a much faster exposure system.
After a huge amount of expense in time and money buying and testing incredibly poor LED products I decided to develop my own 356nM UV strip light. Eventually, I designed an exposure system that exposes a platinum print in just 60 seconds.
Prior to the development of my new product I got sideswiped by poor output 5050 UV LED strips which I purchased on Amazon. These 365nM 5050 UV strip material were incredibly bright, but were very low in the output of actual UV. We would discover that they have tiny filters permanently attached to the LEDs designed to block most of the UV but not enough of the UV so that they could not be used with blacklight posters.

I purchased one after another commercial versions of 5050 365nM UV strips and began measuring UV irradiance levels that were disappointing. More than 200 meters of material were soldered in parallel and tested by measuring. All of this material ended up in a bin as trash.
I then tried a super expensive 365nM 2835 product that is popular, but hugely expensive. Our head would have required $4,500 worth of it and although the product was significantly better, I was still not convinced that that was “all there is”.
My investigation of industrial uses of UV-A led to the cannabis industry in Canada which had been pioneering the use of UV-A in the last stages of cannabis flowering to burn the plants which then exuded increasing amounts of THC in order to protect themselves from the UV. The UV was positioned quite high above the flowering plants and I began a quest to locate the source of such powerful UV LED chips. These chips are not sold to consumers.
During COVID-19 the LED factories had no work, were open to collaboration, and we set out to find a way to mate an industrial strength COB LED to a flexible PCB. The sampling MOQs of these chips is 50,000. But, if I could solve this issue for myself I would have developed something that can benefit others. This is how many of the Cone Editions solutions make their way to InkjetMall. We call our new product verifiedUV™ because of the way we developed it.
The factory measures the luminance and provides an Everfine Spectrum test which is exhaustive in its detail. But, it can not indicate what the irradiance of the product will be when assembled by a user into an array for exposing alternative process. The industry still has no standards for UV LED testing.

What I did on my end was to test each successive build and measure the irradiance with the newly released Ian Leake LC3+ UV Light Integrator. Real world results verified with a real world instrument in a real world application of the product.
I went through 4 successive specification builds, but only after first testing and identifying that one of the newest generations of the 2835 LED produced more irradiance than other 2835 LEDs. We broke a lot of eggs as they say because the chips are not designed for flexible strip mounting. Then the factory began tweaking, and we broke more eggs until we hit a level that the factory believed they could still rate and warrant for 50,000 hours of consecutive use. The level we hit was way beyond my initial expectation. This new 2835 365nM UV light strip can produce nearly 700% of the irradiance of the Nuarc. Our exposure for platinum just 60 seconds.
 The LED we have settled on is more commonly used in COB clusters to produce highly penetrative amounts of UV. For strip lighting it is unusual. Maybe ours is the first - but we can not know if others are now on a similar path. We know it's freaking intense, yet the input is still only 10 watts of 12 volts per meter. This is on high end of voltage input for LED strips. These LEDs are very efficient and the heat is not terrible especially in comparison to other LEDs we tested which produced more heat and less irradiance.
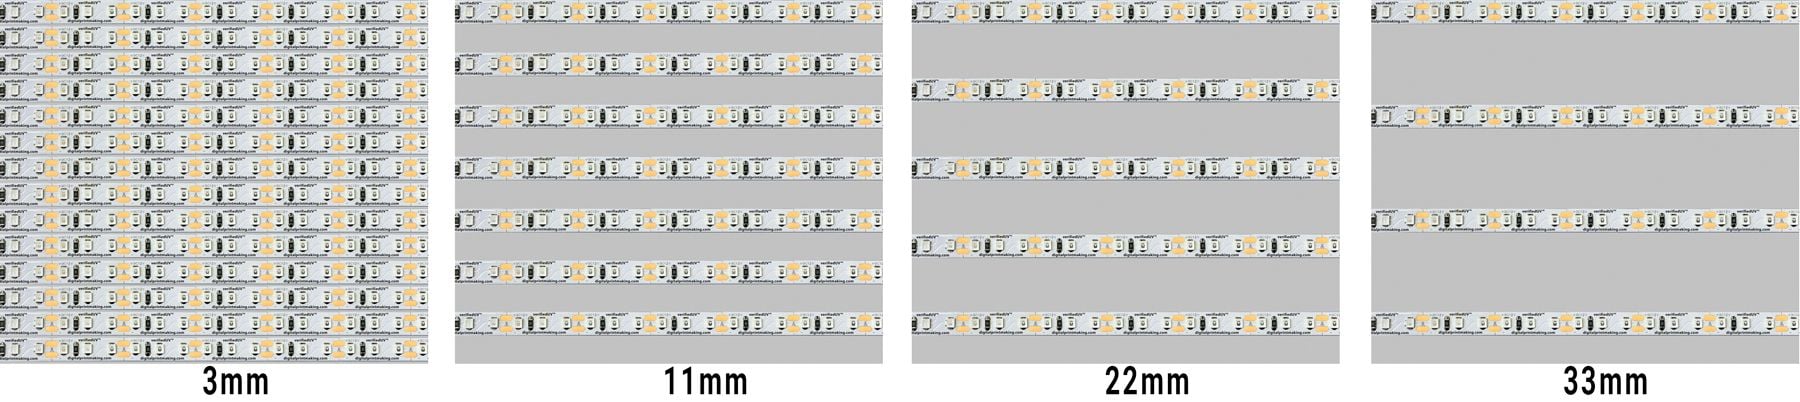
Now some points and tips if you are going the Do It Yourself route. And a lot of people do! If you are patient, we will be building exposing frames shortly. We do plan to offer units for 11x15 paper and up to 22x30 paper. But, if you go the DIY route, the best practice is to square the LEDs in a grid if you want the shortest exposure time. You can space them further apart without without their producing patterns in your prints.
When you decrease the density of strips, it will reduce the illumination and increase the time of exposure. Consider these examples:
Consider the following examples at an exposure height of 4 inches:
-
Strips aligned 3mm apart results in an exposure of 1 minutes for a platinum print.
-
Strips aligned 11mm apart results in an exposure of 2 minutes for a platinum print.
-
Strips aligned 22mm apart results in an exposure of 3 minutes for a platinum print.
-
Strips aligned 33mm apart results in an exposure of 6 minutes for a platinum print.
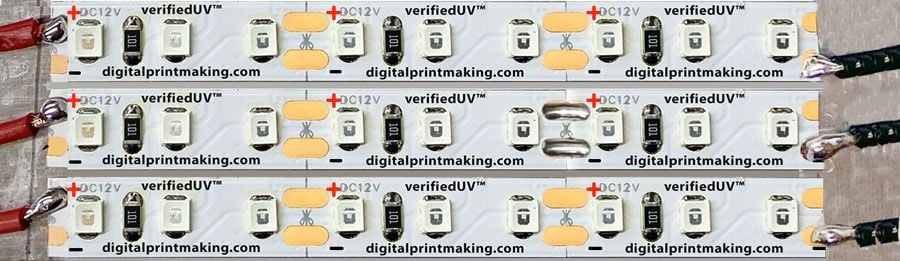
The 2835 has three LEDs per inch and is 8mm wide. So, three strips adjacent to each other should be roughly within the space of an inch. Below is a photo of a 3x1 inch grid showing in red a “square” of the LEDs. It is at this density that we measure maximum irradiance.
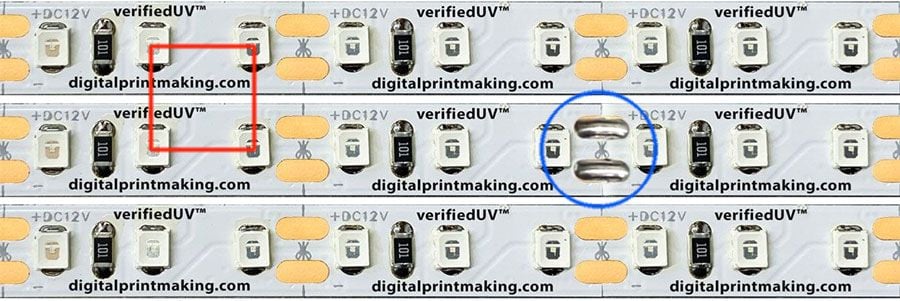
We find that there is very little difference in irradiance between 4-6” with this density. The gap between the strips is 3mm which leaves just enough room to use our connectors (more about that in a moment), although you can also solder to the golden contacts which are at the one inch cut marks. Incidentally, we spaced strips one apart, two apart, and three apart without recording any patterning on a 50% gray platinum print at 4 inches. But, the intensity is much less and the exposures longer. You can do it - as it is more economical to build with - but your exposures will become longer. The greatest benefit of verifiedUV strip lighting is in density.
With platinum print, we now know that paper humidity is one of the most important factors for consistency, dMax, speed and contrast. As long as you are consistent with your workflow these are not issues to necessarily be concerned with. But, very long exposures will certainly dry out humid paper. We believe the shortest possible exposure is important for highest standard platinum prints. That is why we developed such an intensely bright UV LED strip.
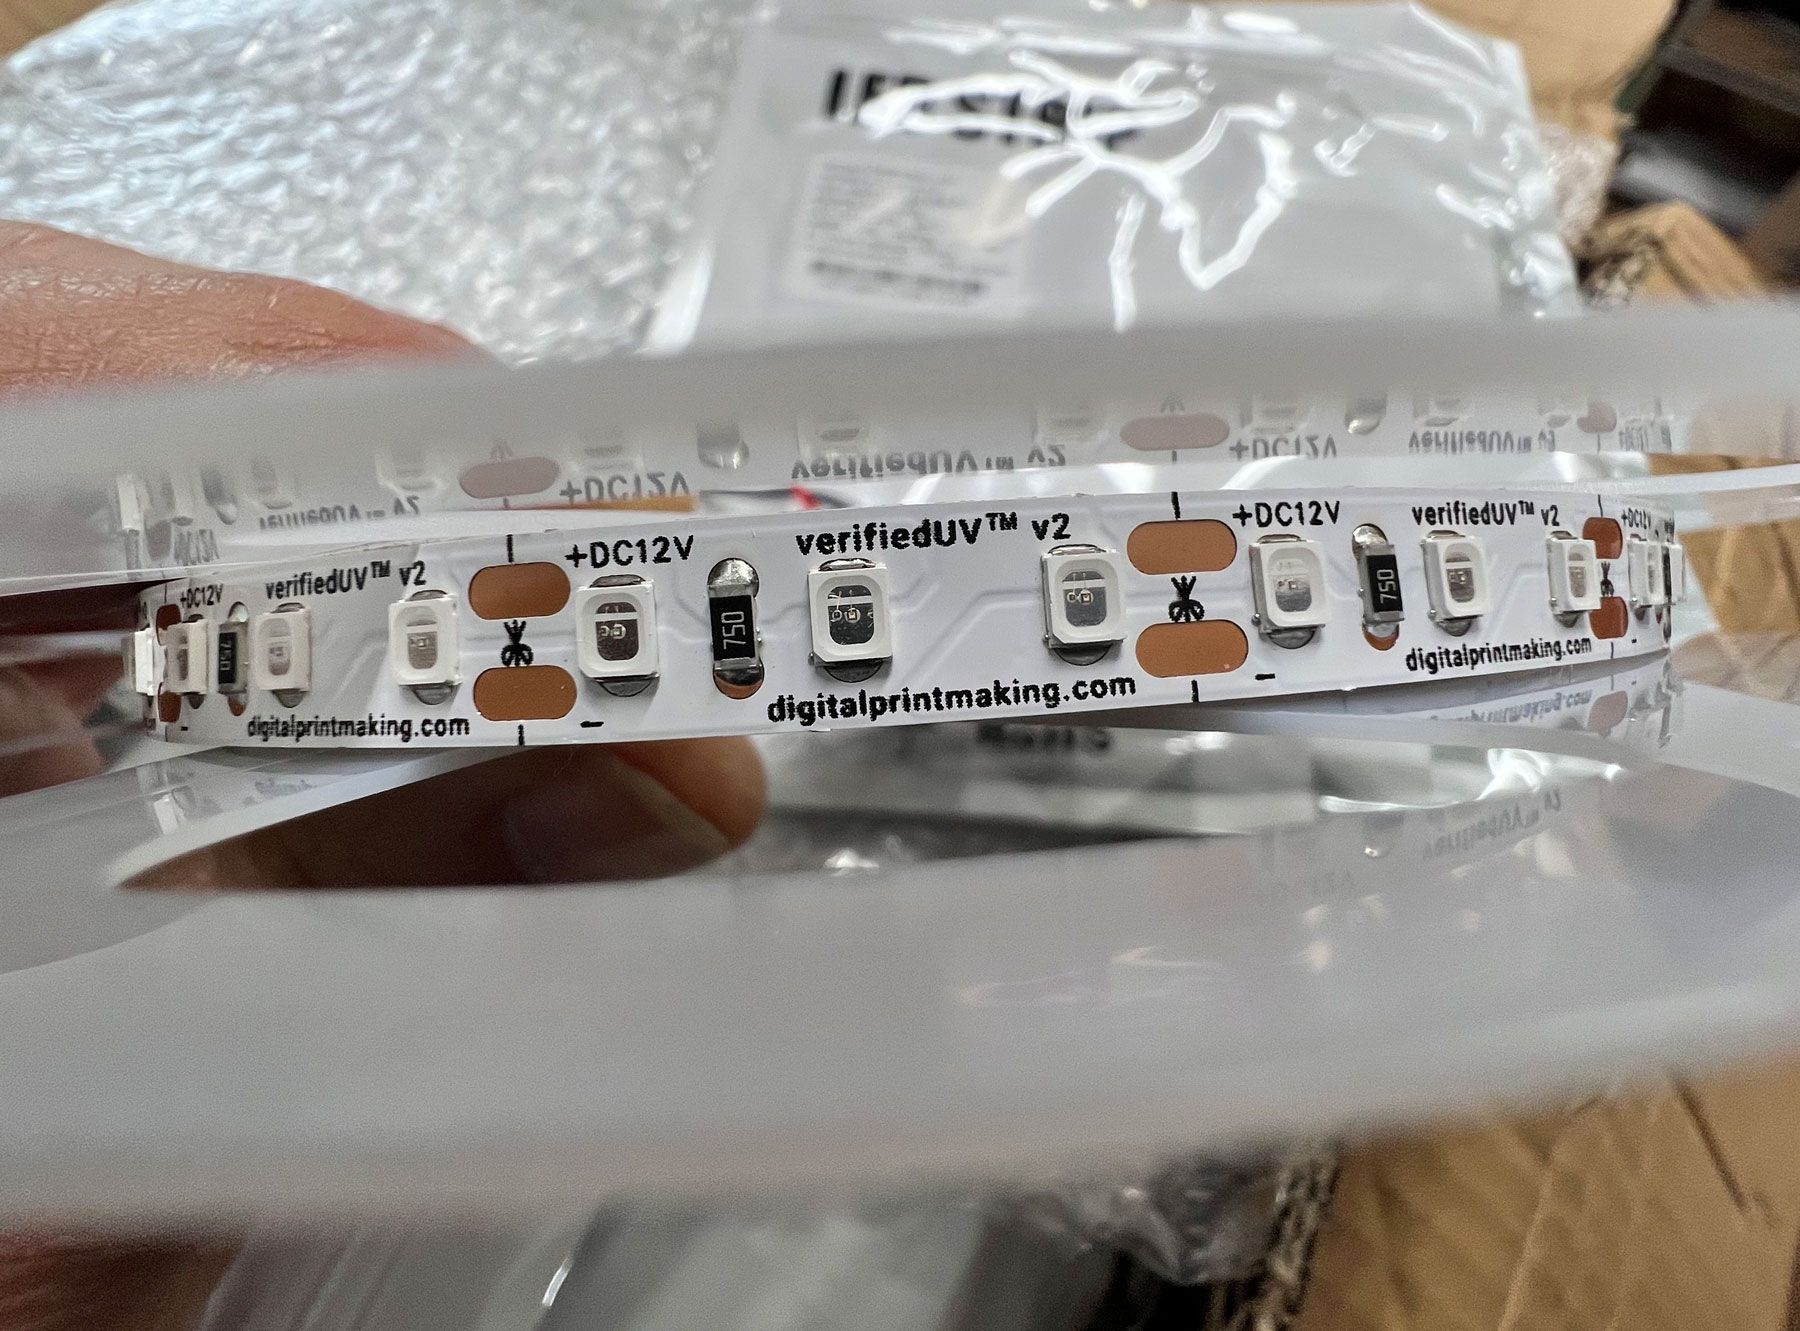
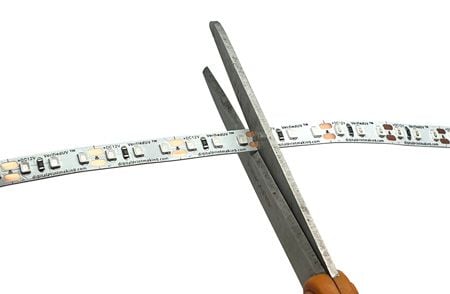 In the blue circle in the photo above are two strips that have been soldered together. The factory produces strips on a standard length machine that are then assembled by soldering into longer 5 meter lengths. This is standard practice across both commercial and industrial strip lighting. But, these solders can fall at a cut line and interfere with your length plans. There are several solders in a reel. Odds are you will not hit one that interferes. But, there is a chance you will. Keep it in mind as you order material to have at least 5-10% more than your calculations. If you can solder, you can cut these strips and solder them back together. But, if you do not want to solder, then you need plan out your cuts well to avoid, or have a little extra on hand.
We advise against wiring in “series” and we encourage to wire in “parallel” to avoid voltage drop. Voltage drop is when the wattage output of the strip lights reduces as length increases. If you wire in series, that means you are connecting one strip to another using a connector that extends them. Think of this like plugging in a long extension cable into another long extension cable in order to reach an electronic device that is quite far away. You might measure 15 amps of electricity at the receptacle that you plugged into, but only 8 amps at the end of your long cable. That is because of voltage drop. Much heavier gauge wire in your extension cables might make up for it, but there is a length at which you can not exceed. For exposure systems you will not want voltage drop resulting in a bright side of the system gradually growing dimmer. You want them all the same voltage and therefore you should wire them in parallel.
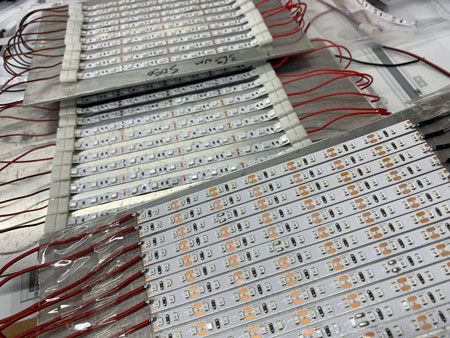
When you cut these strips into rows or columns to power your exposure head, and you run them exactly in the same direction, they will all have a positive side and a negative side. I have marked them with a red + and black - in the image below.
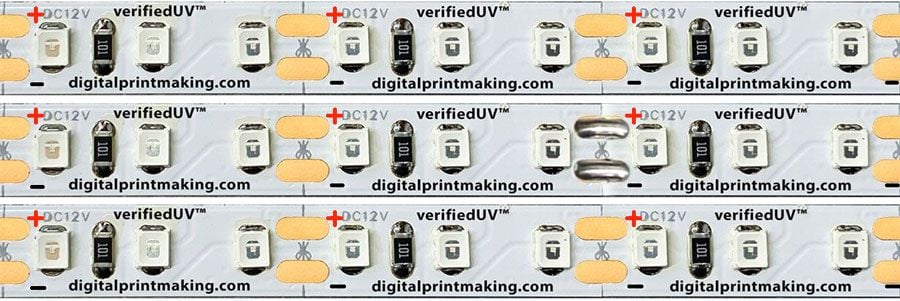
With parallel wiring you would run leads from all the positive conductors on one side of the array and leads from all the negative conductors on the other side of the array. The following is a miniature example showing soldered leads.
We think using strip connectors is stronger and more practical than soldering, because if you disturb and break off a solder from the conductor it can not be repaired without removing that inch and soldering another inch in its place so that the conductor is intact. The conductor will come away with the solder if it breaks. But again, if you are comfortable soldering, you will not mind soldering repairs to the strips. I have done it 50 times! But, now I use connectors. I wanted initially to solder because I suppose I thought it was electromacho! And it was. But, it was a pain in the neck to move the panels around. I foresaw in the future some 5 or 10 years from now someone cursing the person who built our impossibly large vacuum exposure LED system and not realizing it was me.
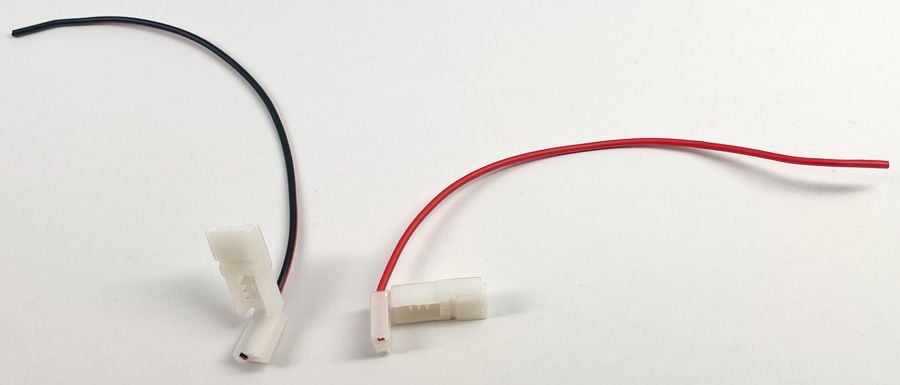
There is not yet a "parallel connector" with one lead, and we will produce them in our next manufacturing run. Instead we opted for a very high quality strip series connector that uses “teeth” instead of compression fittings that are commonly found in strip connectors. The leads are six inches. You can buy packages of 10 here.

Ours can be disassembled and divided from a series connector strip into a positive and a negative "parallel" connector. They are exactly 10mm in width in their plastic fitting and hold our 8mm wide strip snugly. Using these shoulder to shoulder will give you an array with the maximum intensity output. Although the connectors will be touching one another, the strips will be about 3mm apart.
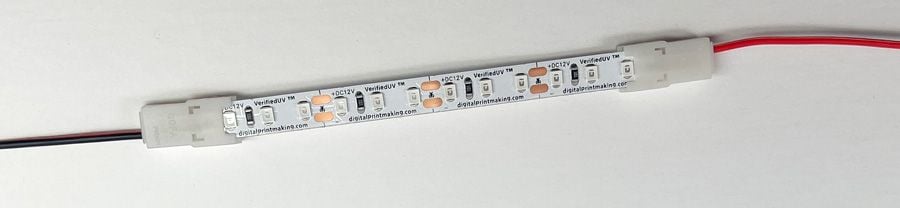
And here is an example of a small piece of strip connected on each end with a positive and a negative connector. Of course, the strips will be much longer... Ours are 45" long. 150 of them side by side!
And where do all these wires go? They should terminate in terminal blocks that are all interconnected. These terminal blocks are then wired to the transformer. The idea behind this is that the available amount of voltage is then distributed equally amongst all the strip rows or columns that are connected to the transformer. There should be no voltage drop this way.
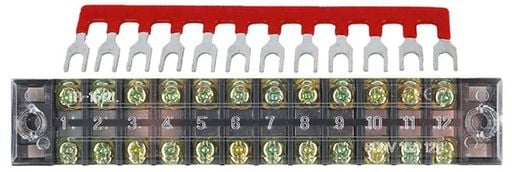 We will sell terminal blocks with pole bridges. They are due in January 28. We will sell two blocks per package, one block with red pole bridges and one block with black pole bridges so you can organize your power leads from the transformer.
Each block has 12 points on two sides of the block. On one side you affix the pole bridge which allows voltage or the ground to flow across every point. On the other side of the block you affix your leads. Two or more blocks can be connected to one another in case you need 30 leads per side, or more. On our big system we have 15 terminal blocks on each side. The 15 blocks are interconnected from one to the other. One side of 15 blocks is positive power, the other side of 15 blocks is negative for grounding.
12v transformers are quite common and not terribly expensive. You should remember the 30% rule and choose a transformer that has 30% more power than you need so that the transformer can perform without overheating. A 5 meter reel of verifiedUV™ uses 14 watts per meter and therefore requires 70 watts of 12v power. 91 watts is 30% more than 70 watts.
Should you decide to lower the intensity of the unit by skipping a strip’s width between adjacent rows…then only 19 rows of 18” length would be required resulting in the need for 122 watts of power using a 150 watt transformer. In this case only 8.6 meters of material would be needed. Your exposure times would be longer.
Finally, let's consider heat. Ideally, you should peel the strip off the 3M adhesive on the back of the strip lights and adhere then directly to a 1/8” aluminum panel so that the heat dissipates behind it. If your panel is large enough you can use a fan to cool it. But, you can not have intensive amounts of UV irradiance without producing heat! Therefore, wood is not recommended to be used as a heat sink. Of course, plenty of people use wood, melamine, plastic, etc. The pre-made panels we will be selling soon will be made of aluminum, pre-wired to a transformer and you can build a wooden box around it leaving the upper electronics exposed. Our systems will be grounded and safe. Our complete exposure system will have built in fans.
The system at Cone Editions Press requires 2,400 watts of power and uses an internal cooling system. Our goal was a shorter exposure time than our Nuarc and less heat from the UV lamps! I hope this guide helps. We will soon expand on it…