SureColor P800 Chip-less Firmware & Ink Cartridge Instructions
Please read these instructions
thoroughly before attempting to modify your P800 with the chip-less firmware (sold by a third party). This system allows you to use third party ink in your SC-P800 US-Model printer. The chip-less firmware bypasses the lock that is found inside of the ink cartridge board on the printer. By doing this, the chips on your cartridge will not be read at all. It is important to correctly install your cartridges in the right ink slots because the printer will not throw an error if a cartridge is installed in the wrong slot.
Making your Epson P800 Printer Work with Third Party Cartridges for $60 bucks: "The Chipless Solution"
-
You do have to have OEM ink cartridges installed into the printer to activate the chipless firmware. After activation the printer will allow any cart. We advise that you make the P800 "Chip-less" before you put any third party ink cartridge in because this way if anything messes up you can recover to the original firmware without having anything modified physically on the printer itself. A Windows OS is required for this procedure. Borrow a friend's computer if you don't have a PC. Or download a free trial of Parallels Desktop for Mac to install Windows on OS X.
-
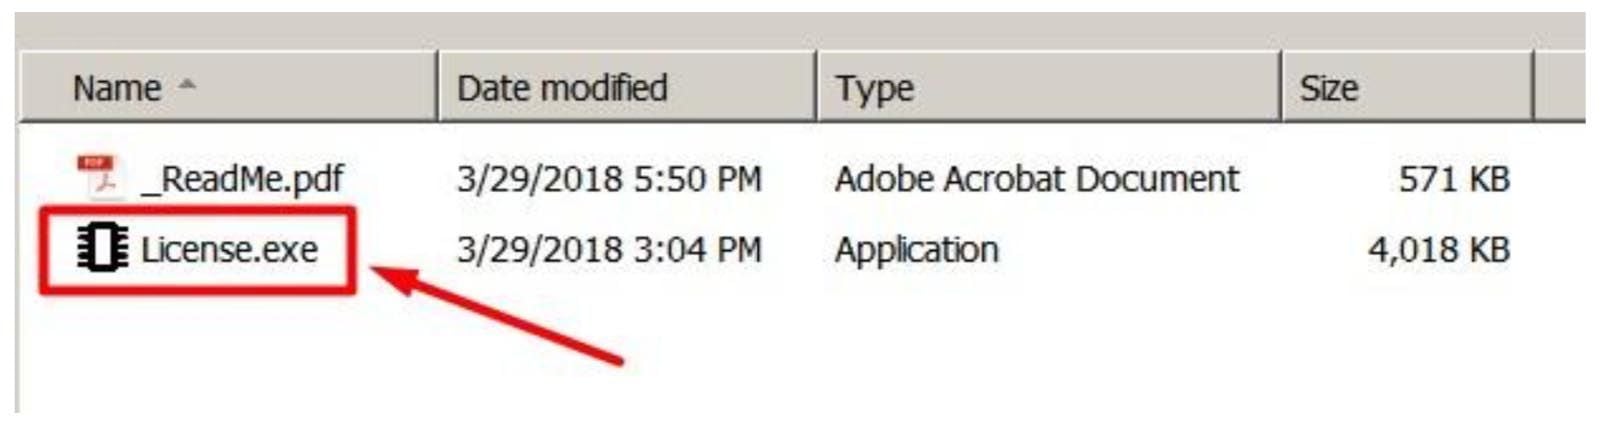
On Windows, download the Firmware, Manual PDF, and License.exe program from https://chiplesssolutions.com/download.shtml
-
On that page click the "Buy" button to purchase an activation key. This is a $60 key. It may be refundable if the chipless firmware does not work properly on your printer. The key is purchased from 2manuals and will be emailed to you. The key "activation" should be used within the activation period. This is not our software. We do not support this software officially!
-
Also download and install the P800 Driver https://epson.com/Support/Printers/Professional-Imaging-Printers/SureColor-Series/Epson-SureColor-P800/s/SPT_SCP800SE and make sure that the printer is plugged into your computer via USB and that the printer is correctly set up in Printers & Scanners. When you download the driver, DO NOT download the "Combo Package." This will force a firmware update that could deactivate your printer. Make sure you download the driver only.
-
Ok, you have your printer (turn it off), it's plugged into your computer via USB, you have your firmware and your activation license app, driver is installed, etc.
-
Boot the printer into "firmware update mode" (no ink cartridges are required in this step):
-
Make sure the printer is off.
-
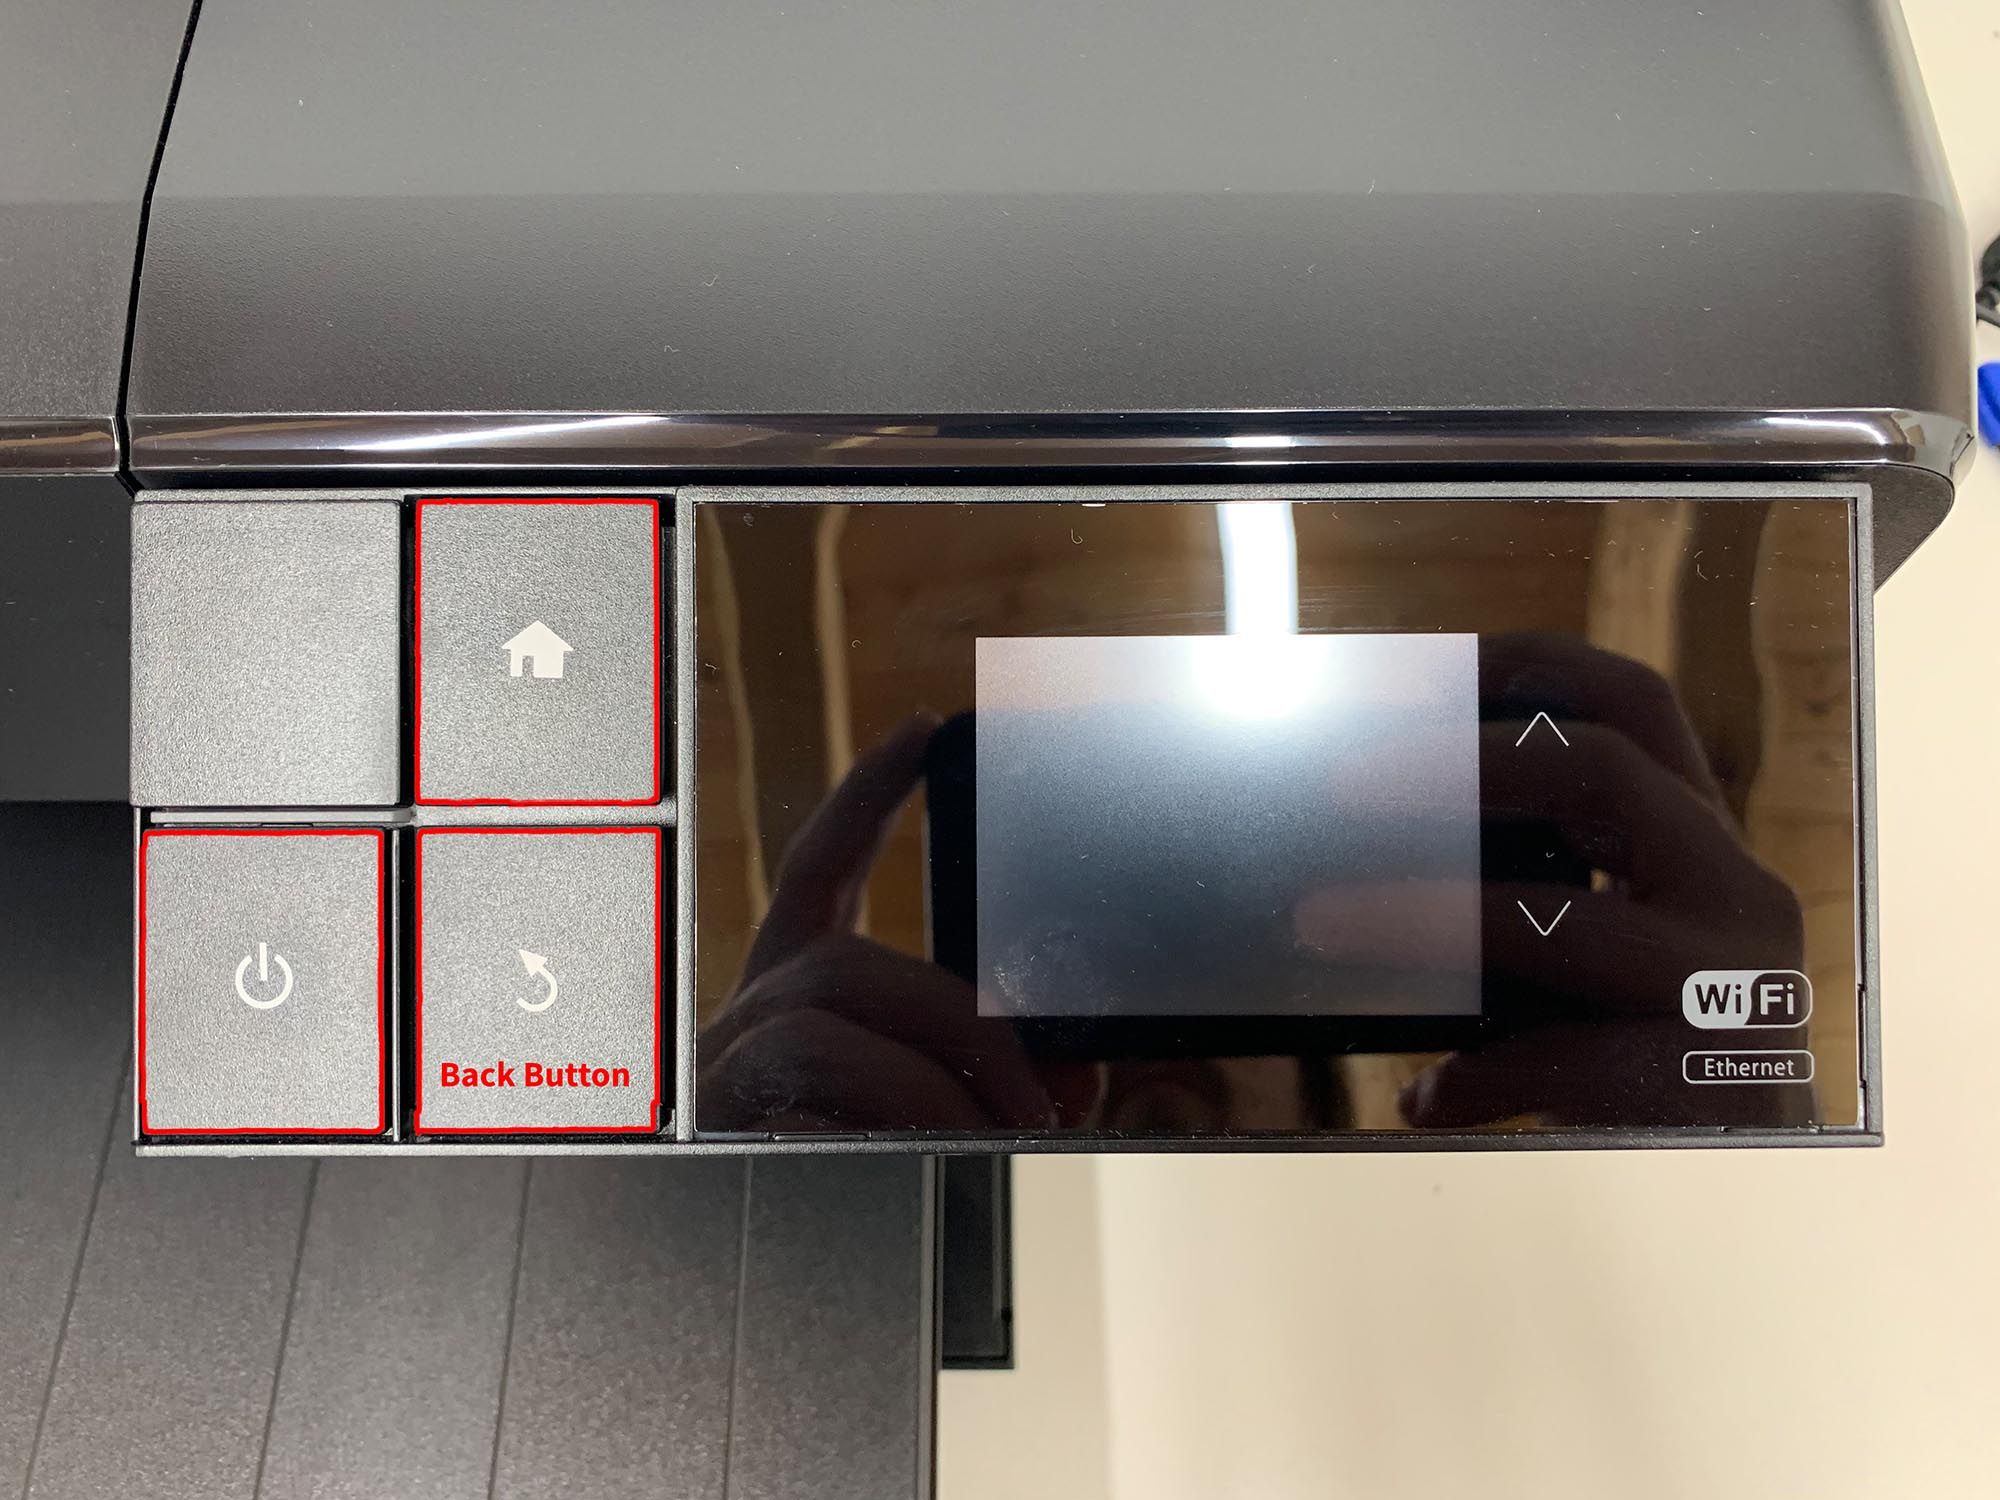
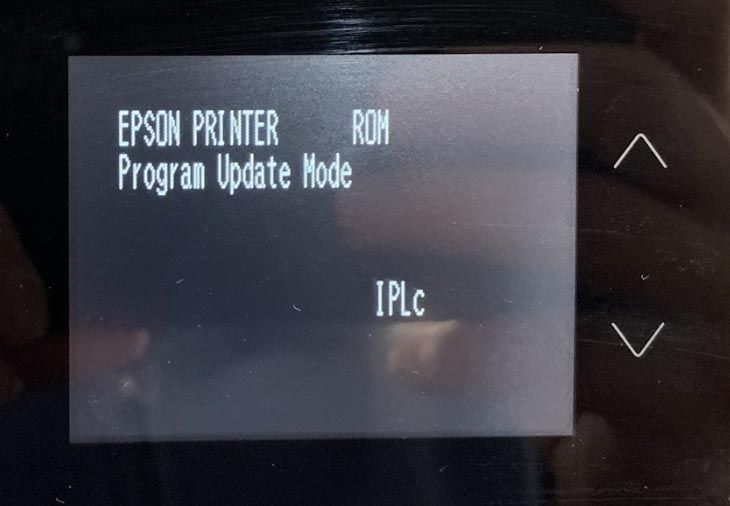
Press and Hold the following buttons for no less than 3 second and no more than 5 seconds: BACK + HOME + POWER and then release only the BACK button. Keep holding the Home and Power buttons. Eventually you will see white text and this means you are in Firmware Update Mode. If you see Red text it didn't work and you need to release all buttons, power off the printer, and try again. You can release the HOME and POWER buttons when that WHITE text appears.
-
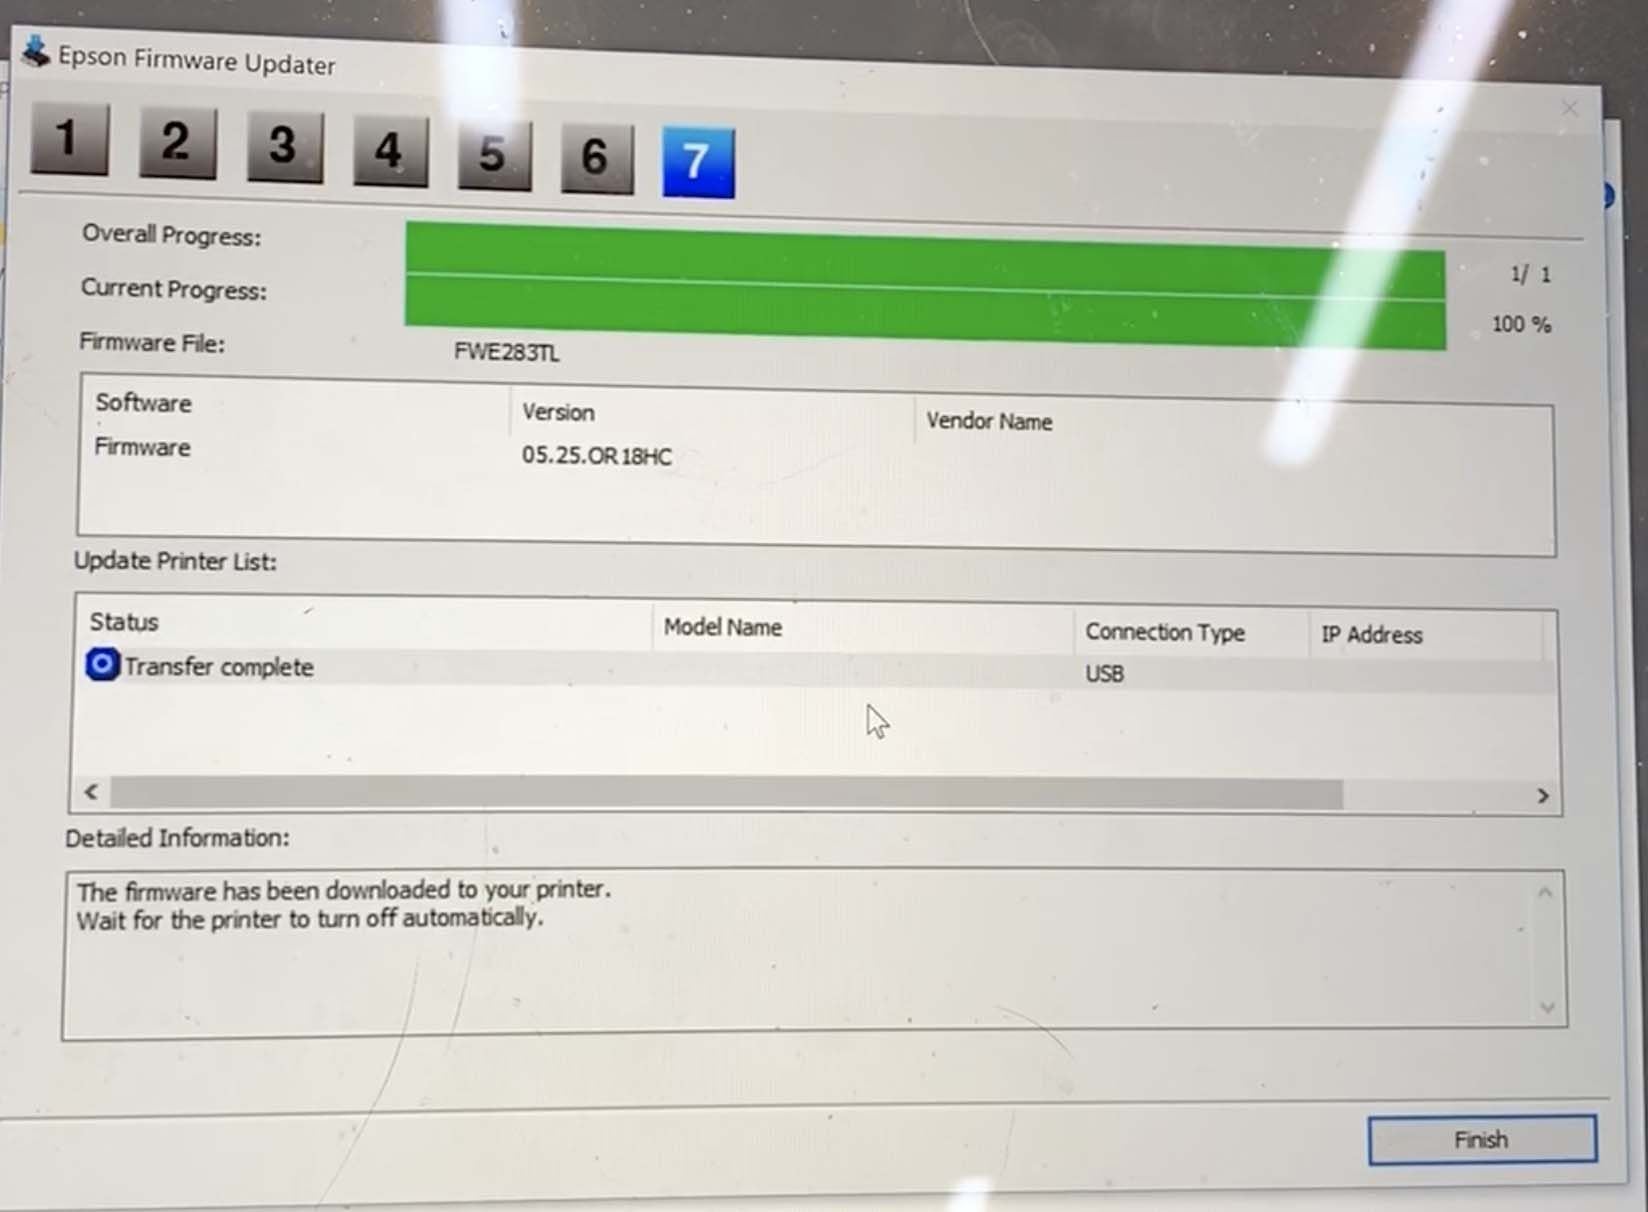
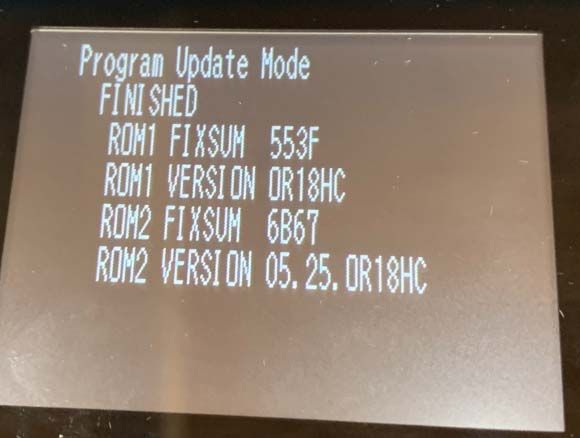
With the printer in Firmware Update Mode and plugged into your computer via USB, run the EPWUPD program to update the firmware on the printer.
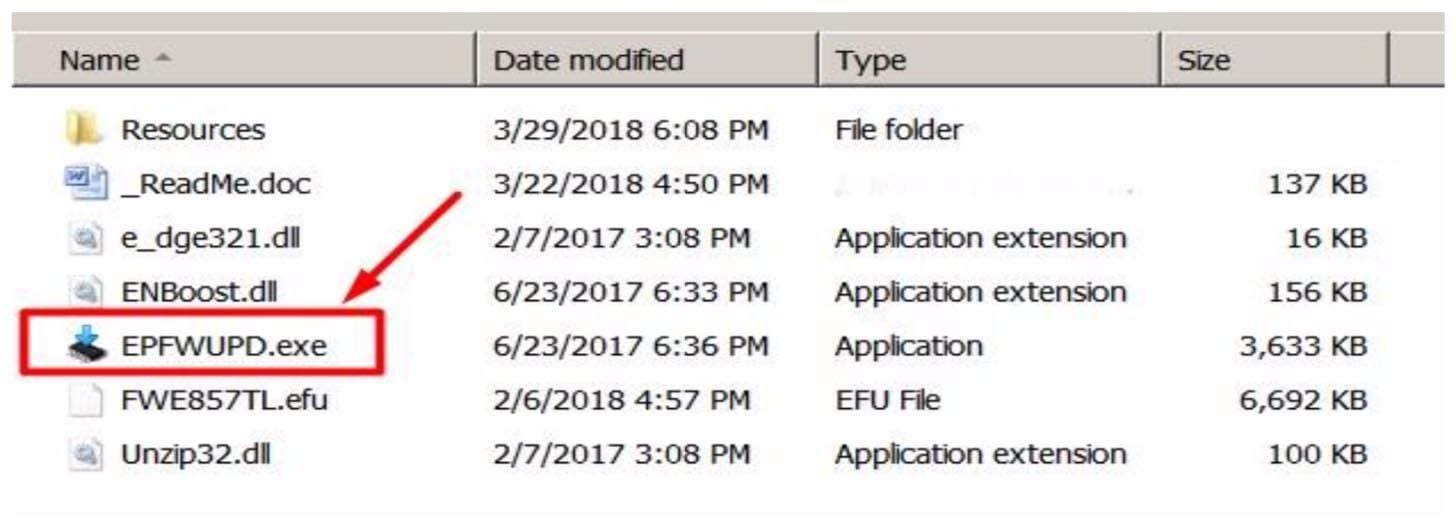
This will take several minutes and the blue power light on the printer will be blinking the entire time. After several minutes (and well after it says "complete" on your computer) the printer will show the firmware version that you just installed. Verify that it's the same as the firmware as-shown on the EPWUPD program and then power off your printer.
-
Turn your printer on normally (still connected to your computer!).
-
Run the License program.
Select your Language. Select your Printer Model. Verify that the printer shows up in this program and then click on " Activate Online. "

-
Copy/Paste your license key. The software will then activate the chip-less firmware on your printer.
-
IMPORTANT: Copy/Paste and Save the "recovery code" that appears after the firmware is activated. You will need this if you ever need to re-install the chip-less firmware on this printer.

-
Turn the printer off and then back on.
-
Test that your printer is indeed chip-less by taking an OEM cartridge out and replacing it with a full and primed third-party cartridge. If everything works you are all good!
-
Remember that your cartridges will always remain "full" on the printer. You need to regularly visually check your cartridges and top them off with ink at the half-empty point for proper ink flow and dependability.
Cartridge Instructions:
Please read these instructions thoroughly before attempting to fill, refill or use refillable cartridges in your Epson SC-P800 printer.
-
Before beginning, you should have one or more refillable carts, 60ml slip-tip syringe, blunt tip needle and plastic priming tip. Keep the 38xx control chips in the cartridge (even though they are not needed). If no chip is present, the cartridge can damage the sensor wires inside of the printe.
-
If this is a new P800 printer, please test your printer first! It is possible to receive a new printer that has one or more misfiring nozzles or some other defect. Make sure to run nozzle checks and perform some print tests to carefully examine print quality. Look for striations or thin lines in the images, which if all nozzles are firing, may indicate head alignment problems. This test will insure that you are installing the refillable carts in a printer which is in top working condition. Failure to test your printer first, may waste time and ink chasing down problems that are related to printer quality.
-
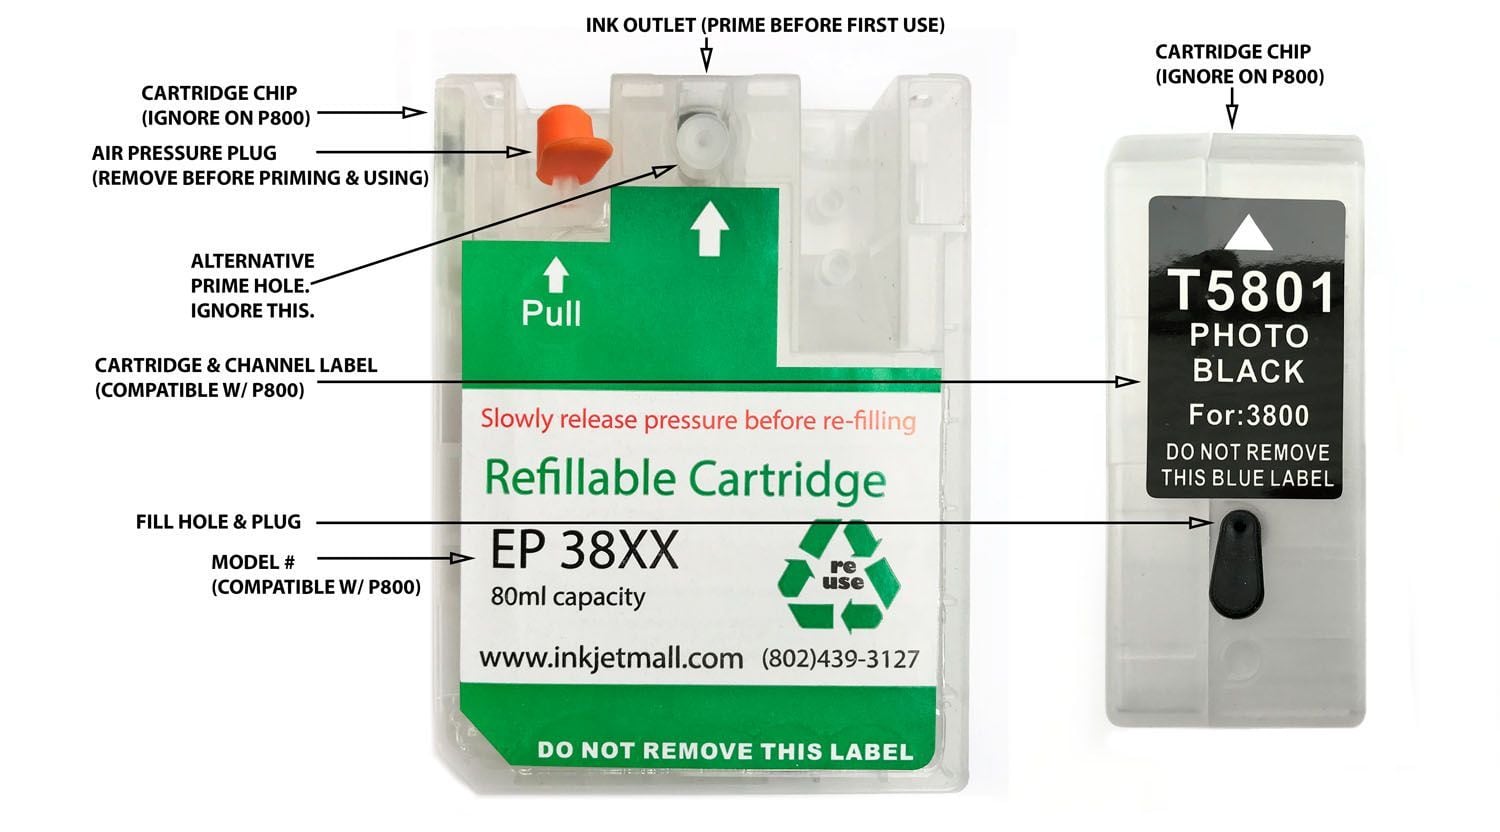
Filling cartridges with ink: Each cartridge has a colored rubber plug with pull tab on the back side- this is the ink fill hole. Place a cartridge upright with fill hole up, then remove the plug. Always shake ink bottles before filling or refilling cartridges to ensure pigment is in suspension for consistent output. Check to make sure the ink bottle and cartridge color position match before filling carts. Using a syringe with long blunt tip needle attached, draw 60ml of ink into the syringe and inject into the cartridge, then draw and inject another 10ml. (70ml fills the cartridge). Do NOT overfill cartridges. There MUST be a small air gap at the top of the cartridge for proper function.
-
Prime cartridge with ink: After filling a cartridge with ink and reinserting the fill hole plug, place the cartridge upright as shown below. Remove the orange vent plug from the air inlet port if it is attached. With priming tip attached to the slip-tip syringe, insert the priming tip straight into the exit valve (ink outlet) to depress the spring and open the valve (the priming tip must be pushed thru the plastic membrane covering the exit valve- do NOT remove the plastic membrane). Pull the syringe plunger to fill the exit channel & valve until a few drops of ink enter the syringe (1mL to 2mL). When ink starts flowing into the syringe, pull the syringe and priming tip straight out of the cartridge. This will close and seal the exit valve. The cart is primed and ready to be installed into your printer. Syringes and blunt needles can be rinsed with distilled water and air dried for future use. Remember: If your cart has an orange plug over the air inlet point, REMOVE it before priming or installing the cartridge.

NOTE: Unprimed cartridges will not have ink in the exit channel, indicated by arrows in the photo below/left. The photo below/right shows a primed cartridge with ink in both chambers. The circle and rectangle chambers marked below MUST be at least 1/2 filled with ink for proper ink flow.

-
Installing cartridges in the printer: Open the cartridge bay door, remove Epson cartridge(s) and install refillable cart(s) into printer, then close the cartridge bay door. The printer should now pressurize carts. When it stops, the green power light should be on and “ready” displayed on the printer LCD panel. If you see a red light or cartridge error on the LCD at this point, there may be a power or connection problem with the chip decoder. Turn the power off on the printer, unplug the printer, and boot it back up.
-
If you install or replace one cartridge at a time, print a nozzle check to make sure all positions are fully printing. If there are missing nozzles or positions at this time, let the printer sit for 1-3 hours, then do 1-2 cleaning cycles before printing another nozzle check. NOTE: If installing Piezography inks, we recommend to print purge sheets with this printer. Ensure that all your nozzles are firing and then follow the instructions for purging your ink lines: https://community.inkjetmall.com/t/939 Note: Piezography on the P800 requires the Piezography Driver which is in development as of November 2017. Go to piezography.com for updated information on this driver.
These cartridges can be refilled & reused MANY times, though for best results we recommend replacing after about a year of use.
-
Have ink, blunt needles and syringes ready on a workspace before removing carts from printer to refill.
-
Remove colored plug from cartridge fill hole and leave air vent hole OPEN. Draw 15ml ink into the syringe. Leaving needle attached to syringe, insert needle tip into cartridge fill hole. Hold cartridge at an angle with fill hole up then gently push syringe plunger to slowly refill cartridge with ink. Tap side of cartridge with your knuckle to release trapped air and allow ink to settle then continue filling.
-
Once cartridge is refilled with ink, remove needle and reinsert fill hole plug, then tap cart exit valve down on a folded paper towel a few times and reinstall into pinter. After installing refilled carts into the printer, wait 10-15 minutes for ink to settle. Always print a nozzle check after refilling carts before printing images.
Refilling Instructions:
When one cartridge indicates that it is empty, open the cartridge bay and take out the empty cartridge. Top it off. Then top off ALL the other cartridges. Hit the reset button on the chip decoder and then place the cartridges back into the printer. Then put the ink cover back down.
In general, we recommend that you top off your cartridges before ink level reaches 1/2” from the bottom for proper ink flow. Keep an eye on the cartridges by pulling out a cartridge and visually gauging the level every few times you go to print. You do not have to reset the ink decoder every time you top off the cartridges this way. Just remember to top off the cartridges every time you DO have to hit the reset button.
As long as the circle and rectangle chambers indicated above are at least 1/2 filled with ink, the cartridge does not need to be re-primed. If the chambers are low or empty, the cartridge must be re-primed to refill the exit channel with ink.
To refill cartridges- place the cartridge fill hole up, then remove the fill hole plug and inject ink using the syringe with blunt tip needle attached. Do NOT overfill cartridges. You MUST allow for a small air gap at the top for proper function. Always shake ink bottles before filling or refilling cartridges to ensure pigment is in suspension. For consistent output, always confirm that the ink bottle and cartridge color position match before filling or refilling. This is important for LC and VLM ink.
PiezoFlush & Repair Instructions:
To do full ink line flushes (called “initial fills”) with PiezoFlush to clear ink lines, re-prime dampers, and unclog nozzles, you can use the Epson Adjustment Program for the P800 available at 2manuals (dot) com. You will need a full set of empty cartridges dedicated to the PiezoFlush liquid. Fill the cartridges with PiezoFlush just the way you wold fill them with ink. Install the flush cartridges and do a full “initial fill” of the printer with the adjustment program. Let the printer sit for 48hrs, do one normal clean, and then do a nozzle check. PiezoFlush is useful for a lot of think including long-term printer storage. For more information on PiezoFlush go to shop.inkjetmall.com
For Piezography Users:
Please go to the top menu item labeled "Support" got to "Piezography Instructions" and click on your printer under the "Conversions" heading.
Troubleshooting & Helpful Information:
Pigment ink settles if not regularly agitated.
To keep the ink printing at full density, gently shake the cartridges every 1-2 weeks to keep the pigment in solution. If the printer is not used for two weeks or more, shake the ink cartridges then do 3-4 cleaning cycles. This will purge the settled ink from the printer’s internal ink lines and fill with ink from the shaken cartridges. It is NOT good to leave pigment ink installed in a printer that will sit unused for an extended time. Use PiezoFlush for that.
Use the printer on a regular basis for best function.
To keep ink moving thru the ink lines and the head moist, print a small image or do a cleaning cycle every week if the printer is not used regularly. It is NOT recommended to leave pigment ink installed in a printer that will not be used for several months at a time- see below for additional information on flushing and storing your printer.
Long term storage of printer.
If you do not plan to use a printer for an extended period of time, it is best to remove ink cartridges, install a set of flush cartridges and flush ink from the print head by doing 5-6 cleaning cycles, before turning it off for safe storage. Store unused cartridges upright in a sealed plastic bag to avoid drying.
Monitor and maintain humidity levels between 40-60% in the printing area.
This is Epson’s recommendation. Both low and high humidity can cause problems with the printer, ink and paper.
Keep capping station clean to keep the print head clean and printing well.
Cleaning procedures can be found on the Inkjetmall technical support forum: https://community.inkjetmall.com/c/articles. Depending on frequency of printing, the capping station should be cleaned at least once a month to help keep the print head clean and working well.
ConeColor ICC profiles can be downloaded from inkjetmall.com.
Custom profiles can be made by InkjetMall if you wish to use a paper that has not already been profiled. ** If you continue having problems or have additional questions, please refer to our InkjetMall Support Forum, which contains lots of helpful information: https://community.inkjetmall.com