Piezography B&W Digital Printing Workshop Syllabus
Revision 2019
This course will take you from basics to mind blowing in four days. Absolutely everything you ever wanted to know about Piezography and quite a bit more. Learn directly at the Studio that invented Piezography from the instructors who continually design and update it!

Day 1: Necessary Knowledge
A little knowledge goes a long way. A lot of knowledge goes further. The right knowledge is essential to a good start as well as advanced image development. This day is devoted to making sure you step on the correct path.
-
Introductions
-
Overview of the
-
Piezography process
-
Driver/Curve installs
-
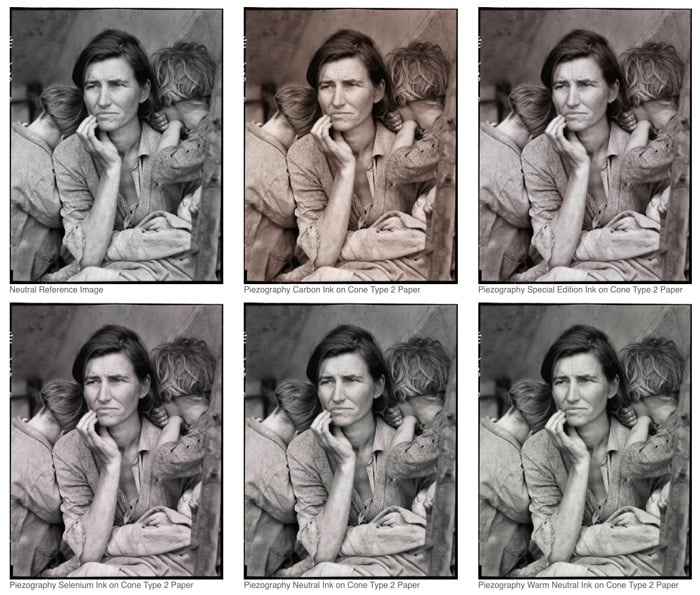
Visual examples of all major Piezography Inks
-
Intro to QuadTone RIP and QTR Print Tool
-
Piezography Curves (Pro
-
and K7)
-
Setting up Photoshop
-
Setting up Lightroom
-
Setting up QuadTone RIP
-
Quick print demo with Pro Blending
-
Lunch Break
-
Intro to Paper Options
-
Free print time
Piezography® has evolved from a system invented by Jon Cone at Cone Editions Press in 1994 that operated on $123,000 IRIS inkjet printers. Piezography for Epson printers was first released in 1999 as a beta and in 2000 as a commercial release.
Since then, Piezography has introduced many important innovations such as using 100% pigment ink for Epson printers prior to Epson itself; proprietary monochromatic ink ICC profiles for the Epson printer driver; acrylic co-polymer encapsulated pigment inks. Proprietary gamma 2.20 output media profiles for the QuadTone RIP printer driver. Perfected digital negatives. Split toning ink sets. The list goes on...
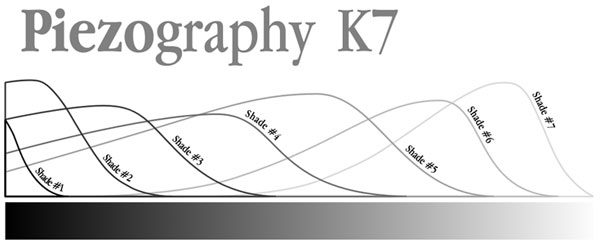
In the space of a small media file called a “curve” in QuadTone RIP, is the innovation of Piezography software. The Piezography profiler produces media profiles which turn QuadTone RIP into a turnkey operation. These Piezography curves are produced on a proprietary software which we began writing about 2002. They enable QTR to force the Piezography ink laden Epson printer to produce much higher resolution than the printer was capable of. It produces extremely smooth output that imitates a modified Gamma 2.20 contrast and it separates highlights and shadows like nobody’s business.
This is the day where you learn how to prepare your printer, how to install the software and inks, and how to operate the system to get the best possible output.
Day 2: Necessary Practice
I know I can fly! Just a little reminder here and there - but it’s time for less talking and more rocking. Today it’s time to begin printing with the systems on your own.
-
Piezo Ink installation
-
Supported Printers
-
Debugging a Printer
-
Preventative Maintenance
-
Printer Rescue
-
Other Hardware Topics
-
Lunch Break
-
The Linear vs ICC workflow
-
Softproofing & Studio Setup
-
Free print time (1 or 2 hrs)
-
Introduction to Piezography Professional Edition Toolset
-
1-1 Linearizations
-
Free print time
Today the workflow begins in detail starting with the nuts-and-bolts of installing Piezography inks into a printer and all the hardware & maintenance considerations that go along with that.
At Cone Editions Press we’ve been able to maintain our printers for nearly a decade on their original heads by doing preventative maintenance on our printers. We’ll share the secrets that we’ve learned.
After lunch we go into the studio and learn about printing Linear, Softproofing, and printing with ICCs.
We also learn about monitor calibrations, contrast, viewing lights, and lighting a studio correctly for your monitor.
Then the big bazookas come out and we introduce the Piezography Professional Edition Toolset (something everyone in the room has access to as a workshop attendee).
The PPE toolset enables perfect calibration of the Piezography print on any paper. We demo the process and then each person will have at least one chance to actually complete a new Linearization on their own over the next two days!
The rest of the day is spent printing and using all the knowledge absorbed from the first and second days. This is the day where you learn how to prepare your printer, how to install the inks, and how to operate the system to get the best possible output.
Day 3: Dig a Little Deeper
Now take what you’ve learned and go forth and make prints!
-
Free Print Time
-
Brief intro to Piezography Digital Negative (no wet process in this workshop)
-
Continual 1-1 Linearizations
-
Understanding resolution and scaling
-
Image sharpening
-
Levels and Curves re-cap
-
Printing absolute Black
-
History brushing as a form of perpetual madness
-
Using Layers insanely
-
Lunch Break
-
Show & Tell
-
Free Print Time
Today we will dig a little deeper into how we prepare image files for fine printing. The techniques are deceptively simple and all are designed to leave little to no trace of your stylus or mouse steps. The adage of ‘bring out everything you bring in with you’ applies here. Leave no trace behind. Piezography is unforgiving and merciless to those with poor imaging habits. With its ability to resolve more detail than the Epson driver means that poor sharpening or poor masking will be revealed in the final print. Today is all about finesse.
Additionally, we will demonstrate how to squeeze the absolute best out of ordinary images.

This is the day when the print queues become subjects of efficiency and preference. Everyone busily printing and waiting their turns - so please be ready when your slot in the queue is at hand for a particular printer. It should all be as easy as thinking by this point.
Dana Ceccarelli will demonstrate printer preventative maintenance so you can learn to keep your tools in tip top shape.
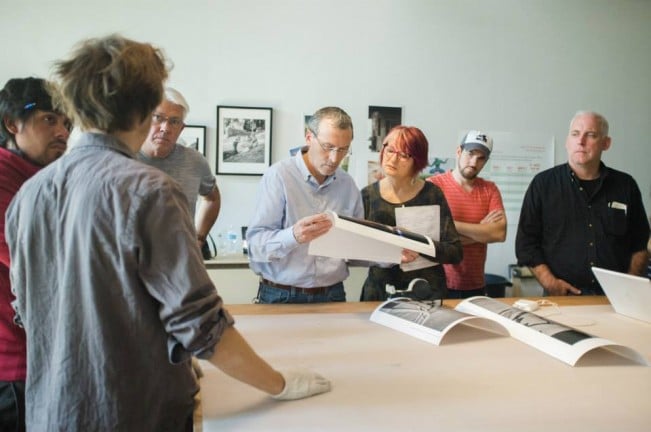
Later in the day we will look at prints produced over the years at Cone Editions Press to deepen the professional understanding of what mastered Piezography printing looks like. We will also introduce you to paper size considerations.
Day 4: Workflow & Wrap-up
From Layout to Finish: on this day we finalize a custom tailored workflow for your specific studio needs and art practice. Leave with a "prescription" of items you need to get set up in your home environment.
-
Wide Format Printing
-
Teaching Piezography
-
Print Handling & Packing
-
Retouching
-
Longevity and fade testing
-
Break for Lunch
-
Group print-show and talk
-
Questionnaire & Wrap-up
Today is all about professional printing, paper handling, longevity considerations and more.
We talk about how Piezography works in the classroom, how it works in professional print studios, home studios, and we also have time to work on some larger paper sizes.
Later in the day we’ll do retouching and pack/ship demos. By the end of the day everyone’s bellies and brains will be full and they’ll have nicely packed prints from their week of production!